Indoor photography covers a huge range of situations – from kids’ birthdays to high-end interior shootings. Basically, everything that is shot indoors.
Assuming that you don’t own studio lighting gear, all you’re left with is a light that’s already in your space. Because of that, indoor photography is often not-so-easy to shoot. Why? Because most of the time, the light in indoor spaces is poor and you need to learn to set your camera for low light situations.
Here, we’ll focus on some basic principles to follow while shooting indoors.

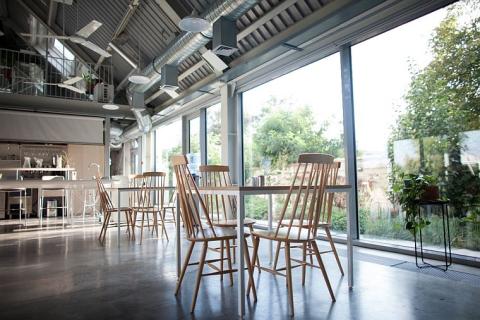
Problems disappear if there is a plenty of natural light
Manual Mode: Try to Avoid Built-In Flash
The indoor photography is a real test on how much do you understand your camera and settings that come with it. When you shoot indoors, manual mode is a must. Otherwise, in low light situations typical for indoors, on automatic mode, your camera will fire a built-in flash pretty much always. In such situations, you should avoid the built-in flash because it gives an unnatural, flat light that makes your subjects look unflattering.

Make the most out of the low light situation with aperture wide open
Camera Settings for Indoor Photography
So, you’ve chosen the manual mode and now’s the time to put your settings right. Shutter speed, aperture, and ISO – as we all know, these three settings are everything and will determine the final result of your image. The most of the time while shooting indoors, the quantity of light in a space you’re photographing in is low. Because of the low light situation, your settings need to comprehend with it.
Aperture
For indoor photography, your aperture should be as open as your lens allows you – f1.6, f2.8, f3.5. With f-number this low, your depth of field will be shallow. Pay attention to that if you’re photographing, for instance, a group of people, because not everyone will be in focus and you’ll need to close your aperture a bit.
Shutter speed
Shutter speed shouldn’t be slower than 1/60 if you’re shooting from hand. If you go below this speed, your images will become blurry because of the handshaking. The better option is to shoot with the shutter speed where no blur occurs, even if the images result as underexposed. If you shoot in raw, the underexposed images aren’t a problem because you can edit them in Lightroom, increase the exposure and compensate for the light you need.
ISO value
As for the ISO number, you can go as high as your camera allows you. Depending on the quality of a sensor in your camera, some cameras allow you to shoot with ISO number as high as 3200 or above, without getting any grain or noise in the image. But, keep in mind that most of the cameras start to get a bit of noise above the ISO 1600.

See: ISO Settings for Night Photography
Using a Tripod: Pros and Cons
Depending on the subject you’re shooting, a tripod can be a great tool to help you in low light indoor situations. The tripod allows you to use slower shutter speeds and get clear and sharp images that look professional. It’s really useful if you, for instance, are shooting interior spaces. However, the tripod can become a bit of a burden if you need to shoot something dynamic (kids’ birthdays or any type of events). It makes you static, you don’t have a freedom of movement.
There is also one more thing to pay attention to while using tripods. In some indoor spaces, like museums or churches, it is forbidden by law to use tripods. So, if you plan on using it in a specific indoor space, get familiar whether it’s allowed or not.

White Balance: Auto or Specific?
The difference between raw and jpeg is that the raw files contain a lot more information about the image. Raw format is great because it allows you to shoot with auto white balance and still get the correct WB later in Lightroom post-processing. However, if the light sources don’t change throughout your whole indoor shooting, you can ease yourself and set the WB on daylight, tungsten or fluorescent, depending on the light source. In such way, you’ll get to see right away how your final images will look and also cut the time needed for editing.
