I created this simple floating banana image using a tripod, camera and Adobe Ligtrooms + A little retouching in Adobe Photoshop. I wanted to make the image look even better so I did a HDR image.
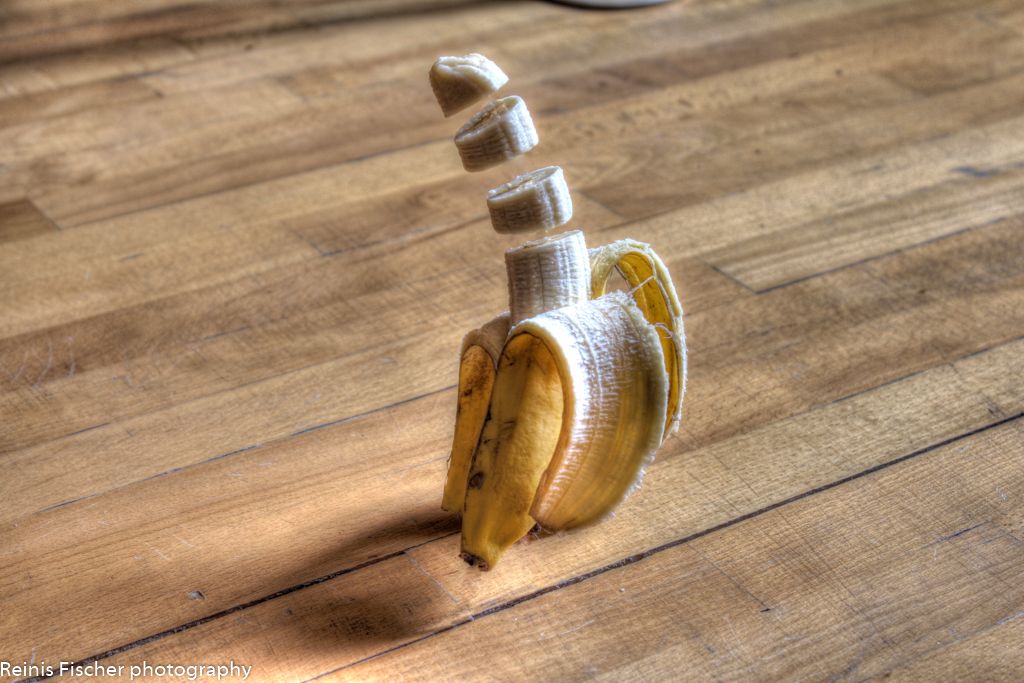
Floating Banana Photography Trick
I did this image for my 365 day photo challenge project and submitted it as day 49 picture. I really feel proud of my self - like on day 1 I barely knew how to take a decent exposure using Manual mode, while on day 49 I'm photographing floating bananas already. I can't wait to see what will I submit at day 365.
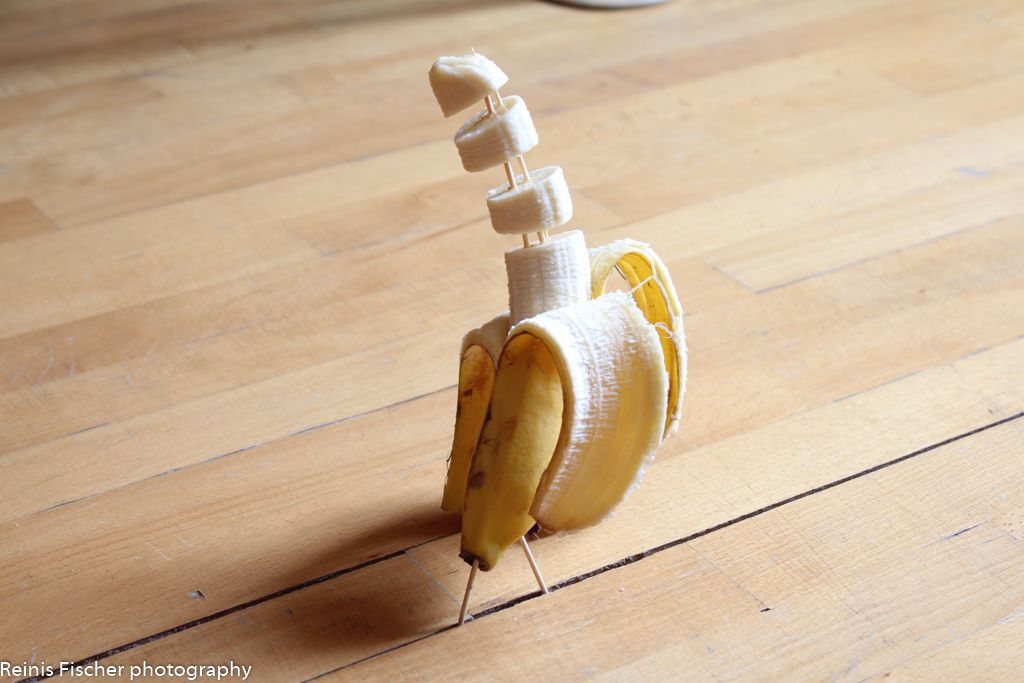
Now back to the floating banana... Actually it is very easy trick. I was taking two separate images - one with a banana and background, while second just with background. I used tripod to have a fixed position for both of my pictures.
Now this is the tricky part - HDR images is done using a bracketing technique, which means instead of taking just one image you are taking at least 3 images (underexposed, overexposed and normal) and then sticking them together in Photomatix (there are other HDR processing tools as well). I wanted to make super cool HDR floating banana picture, so I had to take 6 pictures (3 with banana and 3 with background). Unfortunately the lightening scene didn't matched for final HDR images, and I ended up with using spot removal tool just in one picture (the one with banana)
Regarding picture with banana, all secret is to slice it and stick it together (I used tooth sticks)
Banana photography
I fixed banana on two toothpicks so it looks like it actually floats above the ground, so did I stacked the sliced pieces together. No magic here.
At the end I finished this image in Adobe Lightroom using spot removal tool, and fine tuned above image in Adobe Photoshop.