Recently I was rebuilding a compromised VPS on the Linode - this was a small web server serving some 3 established websites. It took me a few hours from A-Z - launch a new Linode, install a new webserver on it, then transfer data from one host to another.
Once all migration works were done, there was an option to change DNS entry to point to the new server. Nothing complicated. But there is a neat feature from Linode called - Swap IP (IP Transfer). That's a little perk from Linode and quite good for SEO
You can get a cheap VPS starting just $5/mo from Linode. That's what I did - bought a new Linode just for $10
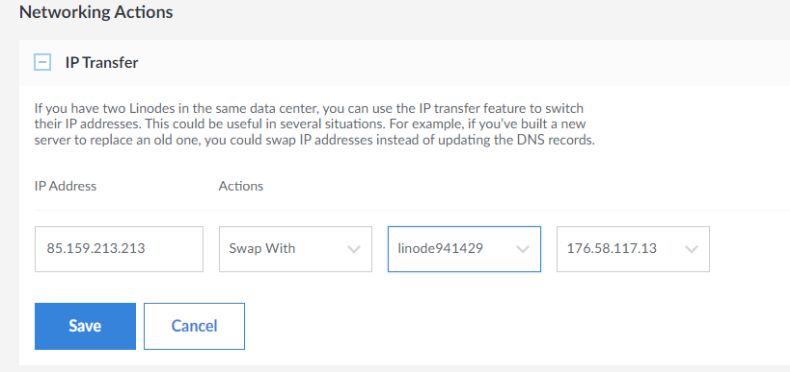
If you have two Linodes in the same data center, you can use the IP transfer feature to switch their IP addresses. This could be useful in several situations. For example, if you’ve built a new server to replace an old one, you could swap IP addresses instead of updating the DNS records.
IP Transfer with Linode
Here are the instructions how to transfer IP on Linode (found here: How do I move an IP Address around between different Linodes?)
- Login to the Linode Cloud Manager. https://cloud.linode.com
- Click on "Linodes" in the bar on the left.
- Select the Linode which has the IP address set up with DNS records.
- In the upper-right corner of the page, you will see a pull down menu that shows the state of your Linode. If it is running, select Power Off and make a note of its name.
- Go back to the Linodes page.
- Select the Linode which you would like to get the IP which is already set up for DNS.
- Click on the "Networking" tab and scroll to the bottom.
- Click on "IP Transfer".
- Select the IP Address (if there is more than one address assigned to this Linode)
- Under Actions, select "Swap With"
- A pulldown will appear that will let you select the Linode that has the IP address you want.
- Select the IP address from those addresses that Linode has.
- Click "Save"
- You can now boot your Linode and work with it.