In this article, I will keep notes on how I upgraded the multilingual Drupal 7 site to a multilingual Drupal 9 site.
Turns out I had originally built this website on Drupal 7 more than 10 years ago and it already felt that the exciting website's look and feel is a bit outdated and we wanted to get a fresh look.
I thought it wouldn't do any harm upgrading the database too. As I have already done a few successful upgrades in the past and as the website was not very complicated I didn't spend a lot of time on this.
As I'm using Linode VPS I decide to go the migrate path, and started with creating a new subdomain on the webserver giving it a prefix d9
As I already had configured the server I will walk through the most essential parts only in this article, for configuring a server from scratch, see this article: How to Install Drupal with Nginx, PHP-FPM 7.4, MySQL, phpMyAdmin on Ubuntu 20.04 - Linode Guide
Configure the VirtualHost for Drupal
We will install Drupal 9 in the directory "/srv/www/d9.caucasustranslations.com". Please replace my domain name in your installation with the domain name of the website that you want to use this Drupal installation for. So let's create the directory:
sudo mkdir -p /srv/www/d9.caucasustranslations.com/{public_html,logs}
sudo usermod -a -G www-data admin
sudo chown -R www-data:www-data /srv/www
sudo chmod -R 775 /srv/www
sudo nano /etc/nginx/sites-available/d9.caucasustranslations.com
Paste the Nginx configuration for Drupal 9:
server {
    server_name d9.caucasustranslations.com;
    root /srv/www/d9.caucasustranslations.com/public_html; ## <-- Your only path $
    access_log /srv/www/d9.caucasustranslations.com/logs/access.log;
    error_log /srv/www/d9.caucasustranslations.com/logs/error.log;

    listen 80;
    listen [::]:80;


    location = /favicon.ico {
        log_not_found off;
        access_log off;
    }

    location = /robots.txt {
        allow all;
        log_not_found off;
        access_log off;
    }

    # Very rarely should these ever be accessed outside of your lan
    location ~* \.(txt|log)$ {
        allow 192.168.0.0/16;
        deny all;
    }

    location ~ \..*/.*\.php$ {
        return 403;
    }

    location ~ ^/sites/.*/private/ {
        return 403;
    }

    # Block access to "hidden" files and directories whose names begin with a
    # period. This includes directories used by version control systems such
    # as Subversion or Git to store control files.
    location ~ (^|/)\. {
        return 403;
    }

    location / {
        # try_files $uri @rewrite; # For Drupal <= 6
        try_files $uri /index.php?$query_string; # For Drupal >= 7
    }

    location @rewrite {
        rewrite ^/(.*)$ /index.php?q=$1;
    }

    # In Drupal 8, we must also match new paths where the '.php' appears in the middle,
    # such as update.php/selection. The rule we use is strict, and only allows this pattern
    # with the update.php front controller.  This allows legacy path aliases in the form of
    # blog/index.php/legacy-path to continue to route to Drupal nodes. If you do not have
    # any paths like that, then you might prefer to use a laxer rule, such as:
    #   location ~ \.php(/|$) {
    # The laxer rule will continue to work if Drupal uses this new URL pattern with front
    # controllers other than update.php in a future release.
    location ~ '\.php$|^/update.php' {
        fastcgi_split_path_info ^(.+?\.php)(|/.*)$;
        #NOTE: You should have "cgi.fix_pathinfo = 0;" in php.ini
        include fastcgi_params;
        include snippets/fastcgi-php.conf;
        fastcgi_param SCRIPT_FILENAME $request_filename;
        fastcgi_intercept_errors on;
        fastcgi_pass unix:/run/php/php7.4-fpm.sock;
    }

    # Fighting with Styles? This little gem is amazing.
    # location ~ ^/sites/.*/files/imagecache/ { # For Drupal <= 6
    location ~ ^/sites/.*/files/styles/ { # For Drpal >= 7
        try_files $uri @rewrite;
    }

    location ~* \.(js|css|png|jpg|jpeg|gif|ico)$ {
        expires max;
        log_not_found off;
    }
}
CTRL+O and CTRL + X
The Drupal virtual host file has been created, now we have to activate it by creating a symlink to the file in the "sites-enabled" directory:
ln -s /etc/nginx/sites-available/d9.caucasustranslations.com /etc/nginx/sites-enabled/
Test the Nginx configuration and if there are no errors restart Nginx:
nginx -t
systemctl restart nginx
Additonaly make sure you have enabled your subdomain via DNS zones (in my case I configured them on Linode, it took some time to get zones activated, to speed it up you could use virtual hosts on Windows)
Install and Configure Drupal
Enter the directory that we created earlier and download Drupal with wget.
I'm using the latest Drupal 9.3.12. release as of May 8, 2022, make sure you are downloading the latest version by visiting the Drupal download page and writing down the last numbers (version)
cd /srv/www/d9.caucasustranslations.com
sudo wget https://ftp.drupal.org/files/projects/drupal-9.3.12.tar.gz
sudo tar -xvzf drupal-9.3.12.tar.gz
sudo cp drupal-9.3.12/* public_html/ -R
sudo chown www-data:www-data public_html -R
Now visit your Drupal site in the web browser, you should see the following screen
Next from the phpmyadmin create a new database and you should be good to launch the Drupal 9 website
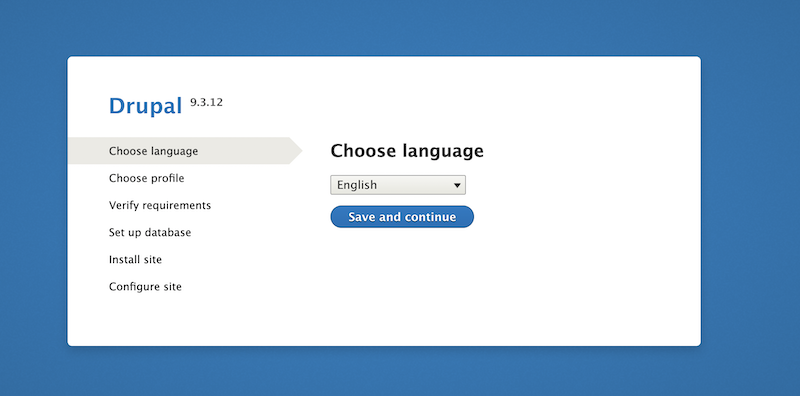
During the installation process I opted to install a minimal version as I love to take full control of settings enabled, but feel free to choose a standard configuration profile.
Now, let's see how to perform an actual site and content upgrade
Make sure these modules are enabled on your Drupal 9 site: "Migrate," "Migrate Drupal," and "Migrate Drupal UI." A quick note, in Drupal 9, modules are renamed to Extend, though the path still is the same - /admin/modules
For migrating multilingual content from Drupal 7 (i18n) enable Migrate Drupal Multilingual
Definitions
- Old site
- The site you want to upgrade.
- New site
- This empty Drupal 9 installation you will import the old site to.
Preparation steps
- Make sure that access to the database for the old site is available from this new site.
- If the old site has private files, a copy of its files directory must also be accessible on the host of this new site.
- Enable all modules on this new site that are enabled on the old site. For example, if the old site uses the Book module, then enable the Book module on this new site so that the existing data can be imported to it.
- Do not add any content to the new site before upgrading. Any existing content is likely to be overwritten by the upgrade process. See the upgrade preparation guide.
- Put this site into maintenance mode.
The upgrade can take some time. It is better to upgrade from a local copy of your site instead of directly from your live site.