In this article, you will learn how to set up a webserver for serving Drupal websites running with Nginx, PHP-FPM 8.1, MySQL, and phpMyAdmin on Ubuntu 22.04
For the following tutorial, I used very much the information from my previous guide with Ubuntu 18.04, but I decided to rewrite it for Ubuntu 22.04 version as it is shipped with php8.1 version and will work with Drupal 9 (most probably with previous versions too)
Prerequisites
- Ubuntu 22.04
- Root privileges.
You can get a cheap VPS starting just $5/mo from Linode. That's what I did - bought a new nanode from Linode
Literally, in a couple of seconds, the new server was up and running - that's what I love about sticking with Linode for years
Follow the basic security guide, see: Securing Your Server
I will use Terminal from MAC to access over SSH (Windows users could use Putty)
Secure your server
Create the user, replacing example_user with your desired username. You’ll then be asked to assign the user a password:
adduser example_user
Add the user to the sudo group so you’ll have administrative privileges:
adduser example_user sudo
Disallow root logins over SSH. This requires all SSH connections to be by non-root users. Once a limited user account is connected, administrative privileges are accessible either by using sudo or changing to a root shell using su -.
sudo nano /etc/ssh/sshd_config
Under # Authetification section change to
# Authentication: ...

PermitRootLogin no
Update the Ubuntu system
sudo apt-get update
Install Nginx and PHP-FPM
Install Nginx with the following apt command:
sudo apt-get install nginx -y
Next, install php8.1-fpm with php-gd extension that is required by Drupal core:
sudo apt-get install php8.1-fpm php8.1-cli php8.1-gd php8.1-mysql php8.1-xml -y
Configure Nginx and PHP-FPM
In this step, we will configure Nginx to use php-fpm to serve HTTP requests for PHP pages. Go to the php-fpm directory "/etc/php/8.1/fpm" and edit the "php.ini" file:
sudo nano /etc/php/8.1/fpm/php.ini
Un-comment the cgi.fix_pathinfo line and change the value to "0"
When using nano command you can use CTRL+W to locate that line. Once changed press CTRL+O to save changes and CTRL+X to exit from nano editor
Now we should modify the default Nginx virtual host configuration. Edit the "default" file and enable the php-fpm directive.
sudo nano /etc/nginx/sites-available/default
Un-comment location ~ \.php$ section, so it look like this
location ~ \.php$ {
include snippets/fastcgi-php.conf;
# With php7.4-cgi alone:
#fastcgi_pass 127.0.0.1:9000;
# With php7.4-fpm:
fastcgi_pass unix:/run/php/php7.4-fpm.sock;
}
CTRL+O and CTRL+X
Then test the Nginx configuration with the command "nginx -t" to ensure that it is valid:
nginx -t
If there is no error, restart nginx and the php-fpm service:
systemctl restart nginx
systemctl restart php8.1-fpm
PHP Info file (Optional)
Next, test that php-fpm is working properly with Nginx by creating new PHP info file in the web directory "/var/www/html"
cd /var/www/html/
echo "<?php phpinfo(); ?>" > info.php
Visit the info.php file at the server IP in a web browser.
Configure the VirtualHost for Drupal
We will install Drupal 9 in the directory "/srv/www/reinisfischer.com". Please replace my domain name in your installation with the domain name of the website that you want to use this Drupal installation for. So let's create the directory:
sudo mkdir -p /srv/www/reinisfischer.com/{public_html,logs}
sudo usermod -a -G www-data admin
sudo chown -R www-data:www-data /srv/www
sudo chmod -R 775 /srv/www
sudo nano /etc/nginx/sites-available/reinisfischer.com
Paste the Nginx configuration for Drupal 9:
server {
    server_name reinisfischer.com;
    root /srv/www/reinisfischer.com/public_html; ## <-- Your only path $
    access_log /srv/www/reinisfischer.com/logs/access.log;
    error_log /srv/www/reinisfischer.com/logs/error.log;

    listen 80;
    listen [::]:80;


    location = /favicon.ico {
        log_not_found off;
        access_log off;
    }

    location = /robots.txt {
        allow all;
        log_not_found off;
        access_log off;
    }

    # Very rarely should these ever be accessed outside of your lan
    location ~* \.(txt|log)$ {
        allow 192.168.0.0/16;
        deny all;
    }

    location ~ \..*/.*\.php$ {
        return 403;
    }

    location ~ ^/sites/.*/private/ {
        return 403;
    }

    # Block access to "hidden" files and directories whose names begin with a
    # period. This includes directories used by version control systems such
    # as Subversion or Git to store control files.
    location ~ (^|/)\. {
        return 403;
    }

    location / {
        # try_files $uri @rewrite; # For Drupal <= 6
        try_files $uri /index.php?$query_string; # For Drupal >= 7
    }

    location @rewrite {
        rewrite ^/(.*)$ /index.php?q=$1;
    }

    # In Drupal 8, we must also match new paths where the '.php' appears in the middle,
    # such as update.php/selection. The rule we use is strict, and only allows this pattern
    # with the update.php front controller.  This allows legacy path aliases in the form of
    # blog/index.php/legacy-path to continue to route to Drupal nodes. If you do not have
    # any paths like that, then you might prefer to use a laxer rule, such as:
    #   location ~ \.php(/|$) {
    # The laxer rule will continue to work if Drupal uses this new URL pattern with front
    # controllers other than update.php in a future release.
    location ~ '\.php$|^/update.php' {
        fastcgi_split_path_info ^(.+?\.php)(|/.*)$;
        #NOTE: You should have "cgi.fix_pathinfo = 0;" in php.ini
        include fastcgi_params;
        include snippets/fastcgi-php.conf;
        fastcgi_param SCRIPT_FILENAME $request_filename;
        fastcgi_intercept_errors on;
        fastcgi_pass unix:/run/php/php8.1-fpm.sock;
    }

    # Fighting with Styles? This little gem is amazing.
    # location ~ ^/sites/.*/files/imagecache/ { # For Drupal <= 6
    location ~ ^/sites/.*/files/styles/ { # For Drpal >= 7
        try_files $uri @rewrite;
    }

    location ~* \.(js|css|png|jpg|jpeg|gif|ico)$ {
        expires max;
        log_not_found off;
    }
}
CTRL+O and CTRL + X
The Drupal virtual host file has been created, now we have to activate it by creating a symlink to the file in the "sites-enabled" directory:
ln -s /etc/nginx/sites-available/0dtespxtrading.com /etc/nginx/sites-enabled/
Test the Nginx configuration and if there are no errors restart Nginx:
nginx -t
systemctl restart nginx
Install MySQL
sudo apt-get install mysql-server sudo mysql_secure_installation
Warning: As of July 2022, an error will occur when you run the mysql_secure_installation script without some further configuration. The reason is that this script will attempt to set a password for the installation’s root MySQL account but, by default on Ubuntu installations, this account is not configured to connect using a password.
See: How To Install MySQL on Ubuntu 20.04 for mysql_secure_installation fix
Prior to July 2022, this script would silently fail after attempting to set the root account password and continue on with the rest of the prompts. However, as of this writing, the script will return the following error after you enter and confirm a password:
Output
... Failed! Error: SET PASSWORD has no significance for user 'root'@'localhost' as the authentication method used doesn't store authentication data in the MySQL server. Please consider using ALTER USER instead if you want to change authentication parameters. New password:
This will lead the script into a recursive loop which you can only get out of by closing your terminal window.
Because the mysql_secure_installation script performs a number of other actions that are useful for keeping your MySQL installation secure, it’s still recommended that you run it before you begin using MySQL to manage your data. To avoid entering this recursive loop, though, you’ll need to first adjust how your root MySQL user authenticates.
First, open up the MySQL prompt:
sudo mysql
Then run the following ALTER USER command to change the root user’s authentication method to one that uses a password. The following example changes the authentication method to mysql_native_password:
ALTER USER 'root'@'localhost' IDENTIFIED WITH mysql_native_password BY 'password';
After making this change, exit the MySQL prompt:
exit
Following that, you can run the mysql_secure_installation script without issue.
Install phpMyAdmin
sudo apt-get install phpmyadmin
Hit ESC when the installation prompts you for auto-configuration because there is no option for Nginx.
Make an easily accessible symlink
sudo ln -s /usr/share/phpmyadmin/ /srv/www/0dtespxtrading.com/public_html/phpmyadmin
Install and Configure Drupal
Enter the directory that we created earlier and download Drupal with wget. I'm using the latest Drupal 9.48. release as of December 2, 2022, make sure you are downloading the latest version by visiting the Drupal download page and writing down the last numbers (version)
cd /srv/www/reinisfischer.com
sudo wget https://ftp.drupal.org/files/projects/drupal-9.4.8.tar.gz
sudo tar -xvzf drupal-9.4.8.tar.gz
sudo cp drupal-9.4.8/* public_html/ -R
sudo chown www-data:www-data public_html -R
Now visit your Drupal site in the web Browser, you should see the similiar screen
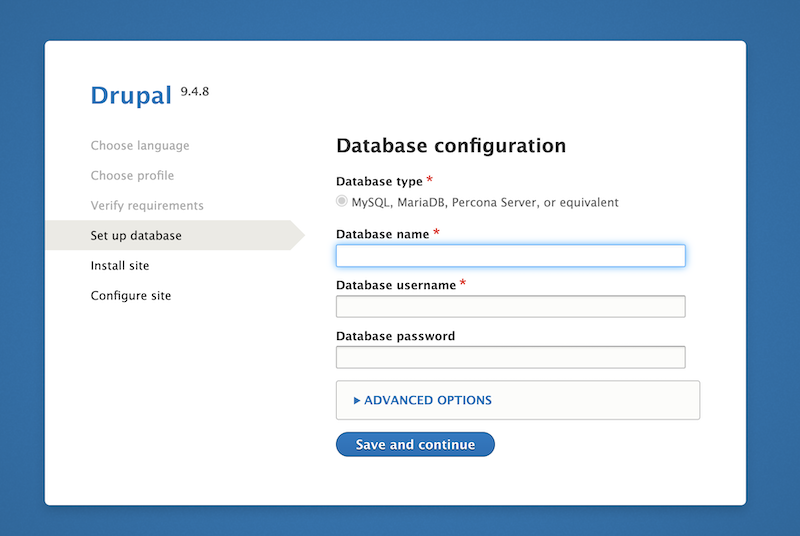
Now, using phpmyadmin login into MySQL and setup database
Optional: How to edit hosts file on Mac
from the terminal
sudo nano /etc/hosts
add your IP adress pointing to the domain name to test before DNS zone get updated