Putty is a nice and neat free SSH terminal for Windows OS, I've been using Putty for years, mostly to perform server-side tasks (Ngnix, Drupal and so on). About a month ago when I started gpu mining experiment and decided to build 12 GPU Ethereum mining rig, I didn't know much about many options available for mining and soon found SimpleMiningOS, which is brilliant (IMHO) - plug and play ready to go from an 8 GB USB stick.
I was pleasantly surprised learning that I could manage my rig using Putty SSH terminal, and for this article, I have decided to list some basic information on how to connect via Putty and some simple commands to get you started.
Locate your internal network IP address (You could run this over internet, but that would require port forwarding and so on, it's not recommended to administer your rig over internet)
In case you are not sure what your internal Ip is, just hover over your rig name in SimpleMiningOS
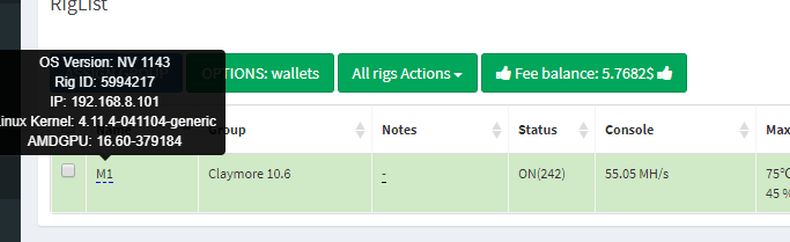
Detecting your rig's internal IP
Next:
- Open Putty
- Enter IP address
- Default username/password: miner:miner
Enter screen view:
screen -x miner

SimpleMiningOS screen session using Putty SSH Terminal
A neat function from terminal view is to enable/disable graphics cards one by one, by pressing the corresponding number, for example, to disable GPU0 - press 0, to enable it back, press again 0
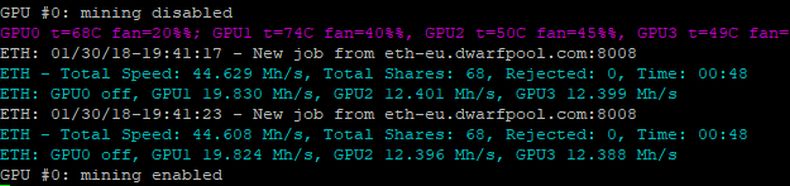
Enable / Disable GPU
From terminal view, you could press S - to list information about all GPU's
Useful info about power usage, fan speed for NVIDIA cards
nvidia-smi
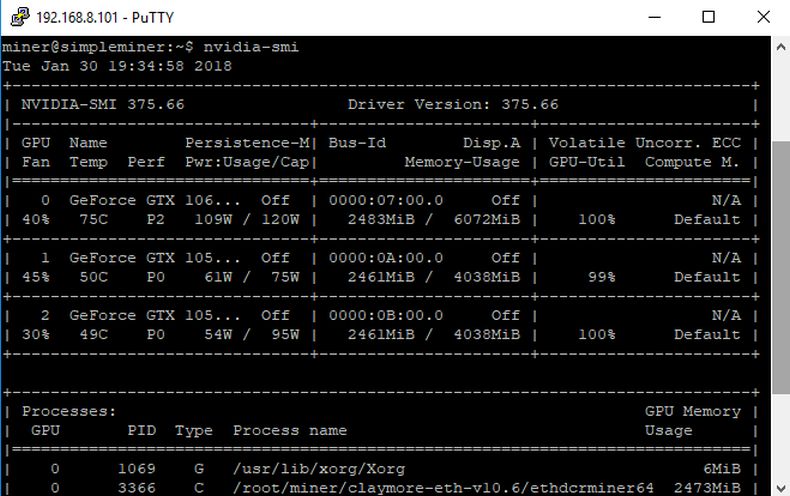
Useful info for Overclocking NVIDIA cards on SimpleMiningOS